extentions
2024.07.31 - [컴퓨터 공학/Networks] - SK networks AI Camp - HTML(기본 설명)
c:/dev/html 폴더를 VSCode로 열고 ex01.html을 만들어주세요.
단축키 : ! + tab키 ==> 기본 틀완성
1. <h1> 태그 : 제목(큰 글씨), 인라인 요소 태그
○ h1 ~ h6 : 숫자가 커질수록 font가 작아지고 bold text (굵은 글씨)입니다.
* 아래 코드를 입력하고 오른쪽 아래의 Go Live 버튼을 눌러서 열어주세요.
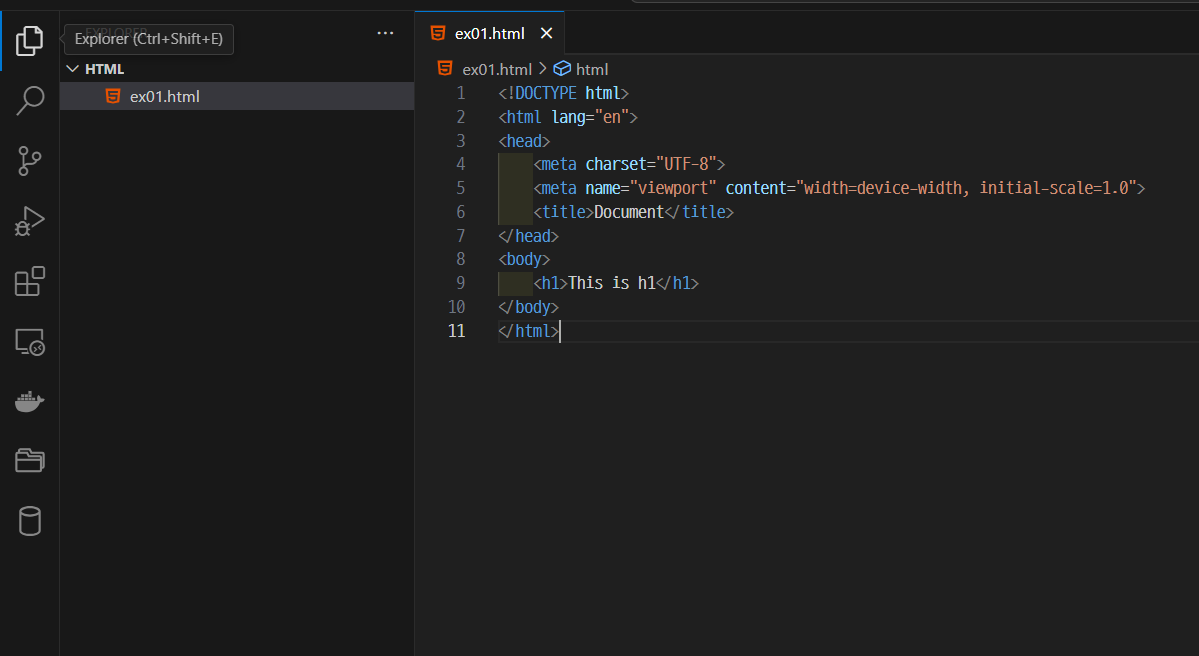
<!DOCTYPE html>
<html lang="en">
<head>
    <meta charset="UTF-8">
    <meta name="viewport" content="width=device-width, initial-scale=1.0">
    <title>Document</title>
</head>
<body>
    <h1>This is h1</h1>
    <h2>This is h2</h2>
    <h3>This is h3</h3>
    <h4>This is h4</h4>
    <h5>This is h5</h5>
    <h6>This is h6</h6>
</body>
</html>

2. <p> 태그 : 글을 입력하는 태그
○ lorem + tab키 : 자동으로 랜덤 한 글
<!DOCTYPE html>
<html lang="en">
<head>
    <meta charset="UTF-8">
    <meta name="viewport" content="width=device-width, initial-scale=1.0">
    <title>Document</title>
</head>
<body>
    <h1>This is h1</h1>
    <p>Lorem ipsum dolor sit amet consectetur adipisicing elit. Cum, non quod! Minima quis temporibus, dolorem illum omnis rerum libero, minus eaque, voluptates provident hic incidunt! Asperiores dolorum tempora quia nostrum.</p>
</body>
</html>
3. <a> 태그 : 링크를 걸어 페이지를 이동하는 코드
○ 형식 : <a href = "링크"> 내용 </a>
○ 새로운 창으로 띄우기 : <a href = "링크" target="_blank"> 내용 </a>
* target default ="_self" : 자기 자신의 페이지에서 들어가기
<!DOCTYPE html>
<html lang="en">
<head>
    <meta charset="UTF-8">
    <meta name="viewport" content="width=device-width, initial-scale=1.0">
    <title>Document</title>
</head>
<body>
    <h3> href </h3>

    <a href ="http://www.google.com"> Google </a>

    <h3> href + target="_blank" </h3>

    <a href ="http://www.google.com", target="_blank"> Google_blank </a>
</body>
</html>
○ ex02.html 생성하고 ex01.html에서 ex02.html로 넘어가기
● href에 ex02의 상대경로를 지정해 주면 됩니다.
상대경로 관련 포스팅
2024.07.30 - [컴퓨터 공학/Networks] - SK networks AI Camp - Linux(설명, 명령어 및 예제)
SK networks AI Camp - Linux(설명,명령어 및 예제)
리눅스 소개Linux○ 컴퓨터 운영체제 중 하나○ 처음 출시한 운영 체제 커널(kernel)인 리눅스 커널에 기반을 둔 오픈 소스 유닉스 계열 운영체제○ 종류 ● Ubuntu Linux, CentOS, Kali Linux ● 하드
joowon582.tistory.com
<!DOCTYPE html>
<html lang="en">
<head>
    <meta charset="UTF-8">
    <meta name="viewport" content="width=device-width, initial-scale=1.0">
    <title>Document</title>
</head>
<body>
    <h3> href </h3>

    <a href ="http://www.google.com"> Google </a>

    <h3> href + target="_blank" </h3>

    <a href ="http://www.google.com", target="_blank"> Google_blank </a>

    <h3> href + target="ex02" </h3>

    <a href = "./ex02.html"> go to ex02 </a>
</body>
</html>
4. <img> 태그
* close 태그가 없음
○ img폴더를 만들어 그 안에 원하는 img를 넣어주고 img1.jpg로 이름 정하기
○ 형식 : <img src="상대경로">
○ 높이(height), 너비(width) 지정해 주기 : <img src="상대경로 height="크기" width="크기">
○ title 지정(이미지에 마우스 올리면 해당 내용이 나옴) : <img src="상대경로" title="내용">
<!DOCTYPE html>
<html lang="en">
<head>
    <meta charset="UTF-8">
    <meta name="viewport" content="width=device-width, initial-scale=1.0">
    <title>Document</title>
</head>
<body>
    <h1> img 태그 </h1>

    <img src="./img/image1.jpg" height="300" width="600" title="타이틀 지정">
</body>
</html>

문제) 이미지를 클리면 naver로 이동하기
<img> 태그를 <a>태그로 감싸주기
    <a href="http://www.naver.com">
    <img src="./img/image1.jpg" title="title 지정">
    </a>
5. <audio> 태그
○ 형식 : <audio controls src="상대경로"></audio>
6. <video> 태그
○ 형식 : <video controls src="상대경로"></audio>
○ 이미지 처럼 보이기 : <video src="상대경로" ></audio> *controls만 빼기
○ 자동으로 시작 : <video autoplay src ="상대경로" muted></audio>
* 브라우저에서 막아놔서 muted로 돌아가게 해줌
○ 계속 재생 : <video autoplay src ="상대경로" muted loop></audio>
7. 글씨체 관련 태그
○ 단축키 : 원하는 태그에서 <>를 빼고 입력 후 * 원하는 갯수 = 그만큼 태그 생성
e.g. p*10 입력 후 엔터 => p태그 10개 생성
○ <i> : 기울임체
○ <big> : 큰 글씨
○ <small> : 작은 글씨
○ <sup> : 위로 쓰기
○ <sub> : 아래로 쓰기
○ <ins> : 밑줄
○ <del> : 가운데 줄 긋기 (e.g. text)
○ <marked> : 마커된 글씨체
<!DOCTYPE html>
<html lang="en">
<head>
    <meta charset="UTF-8">
    <meta name="viewport" content="width=device-width, initial-scale=1.0">
    <title>Document</title>
</head>
<body>
    <p>This is normal text</p>
    <p>This is <b>bold</b> text</p>
    <p>This is <big>big</big> text</p>
    <p>This is <small>small</small> text</p>
    <p>This is <sup>sup</sup> text</p>
    <p>This is <sub>sub</sub> text</p>
    <p>This is <ins>ins</ins> text</p>
    <p>This is <del>del</del> text</p>
    <p>This is <marked>marked</marked> text</p>

</body>
</html>
8. 리스트
○ 순서가 없는 리스트 : <ul> <li> 내용<.li></ul>
<!DOCTYPE html>
<html lang="en">
<head>
    <meta charset="UTF-8">
    <meta name="viewport" content="width=device-width, initial-scale=1.0">
    <title>Document</title>
</head>
<body>

    <h3>Unordered list</h3>

    <ul>
        <li> pizza </li>
        <li> topping</li>
            <ul>
                <li>페페로니</li>
                <li>감자</li>
                <li>고구마</li>
            </ul>
        <li> chicken </li>
        <li> hamburger </li>
        <li> cutlet</li>
    </ul>
</body>
</html>
○ 순서가 있는 리스트 : <ol> <li> 내용 </li> </ol>
<!DOCTYPE html>
<html lang="en">
<head>
    <meta charset="UTF-8">
    <meta name="viewport" content="width=device-width, initial-scale=1.0">
    <title>Document</title>
</head>
<body>

    <h3>ordered list</h3>

    <ol>
        <li>일어나기</li>
        <li>밥먹기</li>
        <li>자기</li>
    </ol>

</body>
</html>
○ Description list : <dl> <dt>타이틀</dt> <dd> 설명 <dd> </dl>
<!DOCTYPE html>
<html lang="en">
<head>
    <meta charset="UTF-8">
    <meta name="viewport" content="width=device-width, initial-scale=1.0">
    <title>Document</title>
</head>
<body>

    <h3>Description list</h3>

    <dl>
        <dt>HTML</dt>
        <dd>This adds structure to a webpage</dd>
        <dt>CSS</dt>
        <dd>This adds stype to a webpage</dd>
        <dt>JavaScript</dt>
        <dd>This adds functionality to a webpage</dd>
    </dl>

</body>
</html>
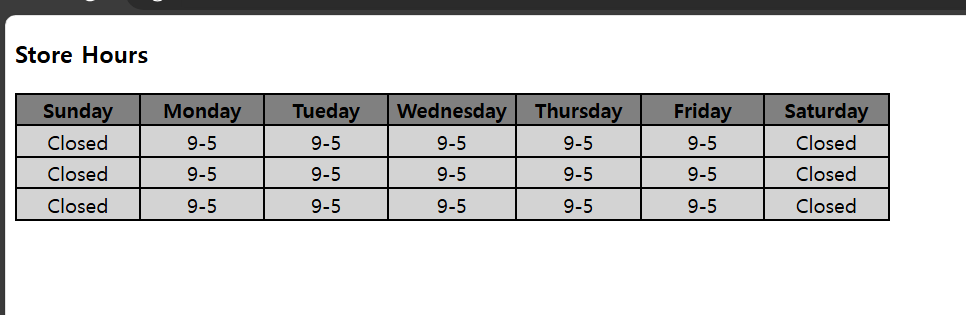
9. table
○ 구조 : <table>
<tr>
<th> 내용 <th>
<tr>
</table>
○ tr : row를 표현 / th : header을 표현
○ 코드
<!DOCTYPE html>
<html lang="en">
<head>
    <meta charset="UTF-8">
    <meta http-equiv="X-UA-Compatible" content="IE=edge">
    <meta name="viewport" content="width=device-width, initial-scale=1.0">
    <title>Document</title>
</head>
<body>
    <h3>Store Hours</h3>
    <table bgcolor="black" width="700">
        <tr bgcolor="grey">
            <th width="100">Sunday</th>
            <th width="100">Monday</th>
            <th width="100">Tueday</th>
            <th width="100">Wednesday</th>
            <th width="100">Thursday</th>
            <th width="100">Friday</th>
            <th width="100">Saturday</th>
        </tr>
        <tr bgcolor="lightgrey" align="center">
            <td>Closed</td>
            <td>9-5</td>
            <td>9-5</td>
            <td>9-5</td>
            <td>9-5</td>
            <td>9-5</td>
            <td>Closed</td>
        </tr>
        <tr bgcolor="lightgrey" align="center">
            <td>Closed</td>
            <td>9-5</td>
            <td>9-5</td>
            <td>9-5</td>
            <td>9-5</td>
            <td>9-5</td>
            <td>Closed</td>
        </tr>
        <tr bgcolor="lightgrey" align="center">
            <td>Closed</td>
            <td>9-5</td>
            <td>9-5</td>
            <td>9-5</td>
            <td>9-5</td>
            <td>9-5</td>
            <td>Closed</td>
        </tr>
    </table>
</body>
</html>
○ 결과
* 색깔 표현
<!DOCTYPE html>
<html lang="en">
<head>
    <meta charset="UTF-8">
    <meta http-equiv="X-UA-Compatible" content="IE=edge">
    <meta name="viewport" content="width=device-width, initial-scale=1.0">
    <title>Document</title>
</head>
<body style="background-color: black;">
    <h1 style="color: red;">Hello!</h1>
    <h1 style="color: rgb(53, 235, 217);">Hello!</h1>
    <h1 style="color: #4feb34;">Hello!</h1>
    <p style="background-color: gray; color: #4feb34;">Lorem ipsum, dolor sit amet consectetur adipisicing elit. Earum ea perspiciatis in laborum dicta. Rerum recusandae mollitia porro vitae impedit iure, dolor et, ea in laudantium molestias. Vel, nemo est.</p>
</body>
</html>
'Networks > HTML & CSS & JS' 카테고리의 다른 글
| SK networks AI Camp - CSS_flex (0) | 2024.07.31 |
|---|---|
| SK networks AI Camp - CSS기능 (4) | 2024.07.31 |
| SK networks AI Camp - HTML(기본 설명) (0) | 2024.07.31 |
| SK networks AI Camp - CSS_Select the plates 정답(17 ~ 32번) (2) | 2024.07.23 |
| SK networks AI Camp - CSS_Select the plates 정답(1 ~ 16번) (0) | 2024.07.22 |